Prologue: Each Japanese Woodblock Print, regardless of its commercial value is a piece of art, made by a skillful artist alone or by the cooperation of artist, carver, printer and publisher. We are obliged therefore, to respect Japanese Woodblock Prints, to conserve and keep such prints under the best conditions available with the aim to give future generations the possibility to enjoy them.
1. Introduction
Do-it-yourself cleaning of prints? Usually the recommendation is given to consult an expert. This advice is legitimate and certainly I would do so with a "Red Fuji" or a "Sudden Shower at Ohashi", but what to do with a print you bought at an auction or garage sale at a very reasonable price? The expenses for an expert's treatment would by far exceed the value of the print.
In the following I share my experience therefore how to remove certain stains from prints by chemical bleaching, particularly stains on the margins. Discoloring on prints is usually of organic nature, spilled beverages, decomposition of glue, mold stains, fatty fingerprints that have decomposed over the years, foxing, browning, matburn or, in the worst case, all together. Depending on their character, some stains can be removed quite easily by simply washing with water or organic solvents or bleaching; other stains are resistant to any method or can be removed only partially. Old mold stains, for example, sometimes remain as a pale grey, and foxing is occasionally very difficult to remove. The method explained is also applicable for bleaching complete prints.
| Return to top |
2. Risks
We should be aware however, that also the dyestuffs, the pigments underlie the influence of bleaching. Fortunately, according to my experience, most pigments are surprisingly stable against bleaching agents; only weak shades of yellow and pink may be negatively affected. On the other hand, if you decide to bleach a complete print because it is deeply browned, it is already beyond the point where you can recognize the subtle colors and patterns. In such cases, as always, it is your personal risk/benefit evaluation to proceed or not.
Furthermore, we have to keep in mind that in principle we talk about two fundamentally different kind of stains: those which are comprised of a material "added" to the paper (glue, fat, etc.), and those resulting by decomposition of the paper (browning, matburn, etc.). It is significant that the removal of the stains of the first category leaves the paper substance almost unchanged, provided proper technique is applied. In the latter case, it is different. The decomposition of paper substance, which we face in browning, cannot be reversed. What we do by bleaching, is degradation and removal of the damaged parts of the fibers, ultimately ending in a loss of paper substance.
Whether paper fibers not yet affected by aging or decomposition get damaged by bleaching, depends apparently on the bleaching agent and is still part of a controversial discussion among experts. My experience, which reaches only a few years back, does not indicate any recognizable damage to the paper substance through the use of hydrogen peroxide as bleach.
| Return to top |
3. Literature
A good source of general information on Japanese paper is Timothy Barrett, Japanese Papermaking, Tokyo and New York: Weatherhill.
A web search with the keywords "paper bleaching" returns you thousands of publications, but it doesn't solve your problem. For more discussion about bleaching of prints, visit the website of David Bull. Useful comments are also available at the website of John Fiorillo.
There is not much printed literature available about bleaching treatment of woodblock prints. One of the general works dealing with conservation of pieces of arts on paper is Anne F. Clapp, Curatorial Care of Works of Art on Paper, New York: Nick Lyons Books, 1987. Although it does not explain in detail what to do with Japanese prints, the overall advice makes it useful for the serious collector. More detail is found in Carl Schraubstadter, Care and Repair of Japanese Prints, Cornwall: Idlewild, 1948 and in a second, enlarged edition in the 1980's. Although most of the content represents the state of the art around the beginning of the past century, this book seems to be the only one dealing with the subject; however, it is very difficult to get.
| Return to top |
- To remove stains by bleaching, Schraubstadter recommends chlorine bleach or what is the same, common household bleach (Sodium Hypochlorite). I do not recommend this agent, because it is a "dirty mixture", it is extremely alkaline and therefore damages easily the paper fiber. Furthermore, if not rinsed sufficiently, chemical residues remain in the paper, causing future damage and decomposition.
- For the bleaching of complete prints, Schraubstadter describes a two step method of – first - complete oxidation of the print with Potassium Permanganate and – second - removal of excess Permanganate and Mangan Dioxide with Oxalic acid. This method, apart from the chemistry involved, requires strong nerves when during the first step your precious print turns completely dark brown like a sheet of old craft paper. I do not recommend this process as well.
- Further bleaching methods published are with Chloramine-T, Sodium Peroxide, or Sodium Borohydride in water or with Lithium Aluminium Hydride in non-aqueous solvents. Also UV treatment is reported for bleaching prints.
- According to my own experience, Hydrogen Peroxide (the stuff to make hair blonde) is the method of choice, whether for individual stain removal or for full bleaching. Hydrogen Peroxide [H2O2] is an easily available chemical product, that is used in millions of pounds daily for commercial pulp and paper bleaching. This agent is very clean, it comprises only water and the peroxide. However, the solution is stabilized with traces of Phosphoric acid, which have to be neutralized after the bleaching.
Warning: Hydrogen Peroxide is a hazardous chemical, it is a very strong skin irritant! Wear plastic gloves, safety glasses, store the material in a cool, ventilated place and keep it out of the reach of children. Do not store in food or beverage containers. Get a Material Safety Data Sheet from the manufacturer/dealer and follow all the instructions.
- Commercial grade Hydrogen Peroxide has a 30% content. This concentration is suitable directly for bleaching of stains on margins but do not bleach your hair with this concentration unless you wish to become bald! If you feel this concentration is too strong (bleaching of the stain happens within a few minutes), you can dilute it with distilled water in the ratio 1:1 or more. For the bleaching of a complete print I recommend a concentration of 10%, which means, dilute in the ratio 1:2 with distilled water.
- Neutralization: Prepare a solution of Calcium Hydroxide [Ca(OH)2] in distilled water. It is a fine white powder, not very soluble in water. Put a teaspoon of the powder in 1 liter of water and agitate well, then filter through a paper (coffee filter). This agent removes traces of acidic substances which are not rinsed off. After drying, it forms a microcrystalline cover of Calcium Hydroxide or Calcium Carbonate respectively on the surface of the paper fibers and buffers for a while the acidic influence on the paper substance.
| Return to top |
4. The process
Bleaching is comprised of six steps:
1. Preparation (equipment, chemicals, check whether the print is suitable for bleaching)
2. Wetting
3. Bleaching
4. Rinsing
5. Neutralization/Buffering
6. Drying
5. Removal of stains on margins
First I explain how to bleach stains on the margins of a print.
- This bleaching process should only be applied to prints whose paper is still strong and heavy. If the paper is very thin, or has become very brown and brittle, don't do this! I strongly recommend making some trials with a not-so-valuable print.
- Do not apply on stains on browned paper. The stain certainly will be removed, but what you get is a white spot of paper on a browned margin. In such cases, if the general conditions allow, full bleaching may be the method of choice.
- Dirt on the paper, dust, ink, ballpoint ink will be not removed.
- Pencil signatures are not affected, they remain.
How to apply Hydrogen Peroxide onto the stain?
First, transfer a little of the bleaching agent (around 2-3 teaspoons) into a clean, non-metallic container. This container is your working container. Never dip a brush or something else into your storage container, never return remaining bleaching agent back from the working container into the storage container, because already small impurities like pigment traces on the brush may lead to rapid and sometimes violent decomposition of the Hydrogen Peroxide. Unused agent left in the working container can be flushed away with plenty of water without risk after you finished the work.
The surface of a wet print is extremely sensitive to mechanical (physical) influence. One easily can damage the paper or remove the pigments from the surface. Therefore, I apply the bleaching agent with the tip of a soft cotton swab, such as ones you use for skin or baby care. This can be done almost "touchless". I do not use brushes, because natural fiber brushes (watercolor brushes) are damaged within a short time and the fibers of synthetic brushes (Nylon) are just too hard.
For this process, do not lay the print on a paper surface or a solid surface, because otherwise all the liquids applied might take a "shortcut" reverso, they penetrate the paper out of control. Best is, to place the print on an old white towel.
Before applying the bleaching agent, wet, don't soak, the paper around the stain with water, this avoids the bleach penetrating the paper around the stain. Apply generously, but do not soak the entire area surrounding the stain, otherwise you may get a sharp edge where the water migrates into the neighborhood. Avoid the Hydrogen Peroxide penetrating into the printed area.
- Never rub the surface of a wet print!
- It takes time to bleach stains, on average 1-4 hours. Be patient, do not expect immediate results. Reapply the bleach every 30 minutes.
- It is difficult to judge the bleaching result while the paper is damp. I also found daylight better suitable than artificial illumination.
- After the bleaching is complete, rinse several times with distilled or de-ionized water (that the water you fill into your car battery). Rinsing means, apply water with a cotton swab and remove excess water with blotting paper by pressing the print after a few seconds. Repeat this step 3 – 5 times.
- For neutralizing, apply the Calcium Hydroxide solution. Do not rinse after this step.
- Put the print between blotting paper, keep a heavy book on top and let it dry. If necessary, repeat the entire process.
Return to top 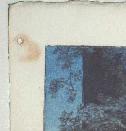
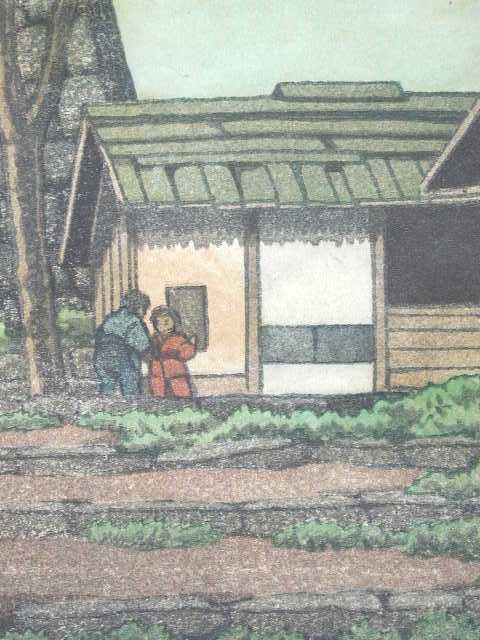
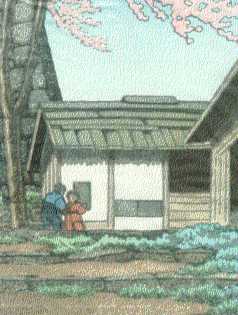
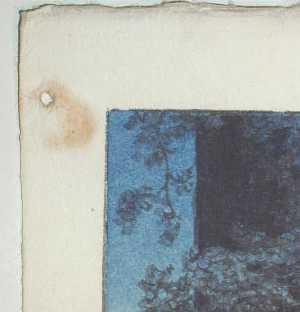
Stain in upper left corner
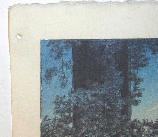
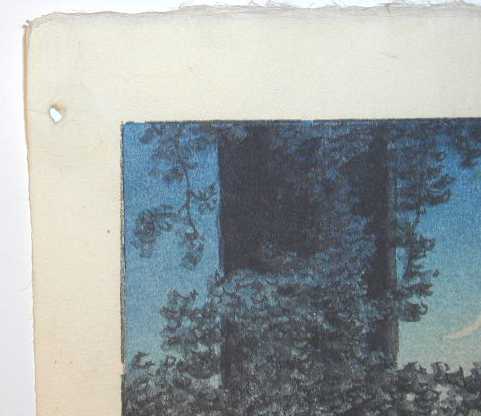
Upper left corner after treatment
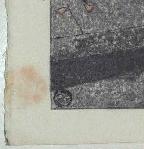
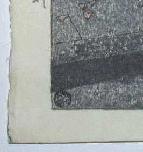
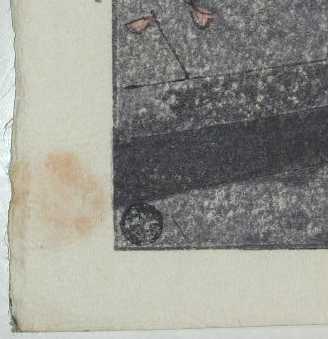
Stain in lower left corner
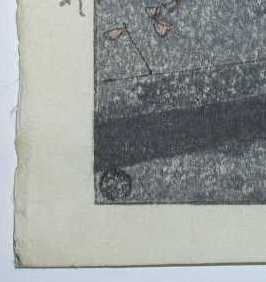
Lower left corner after treatment
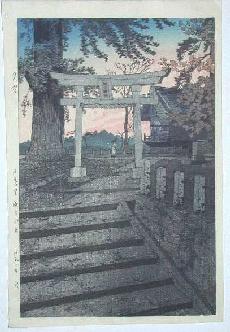
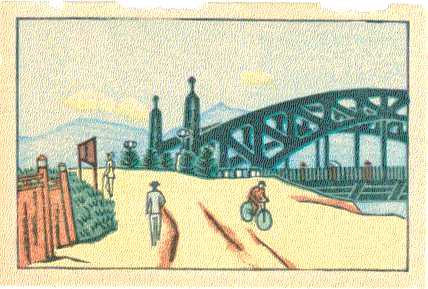
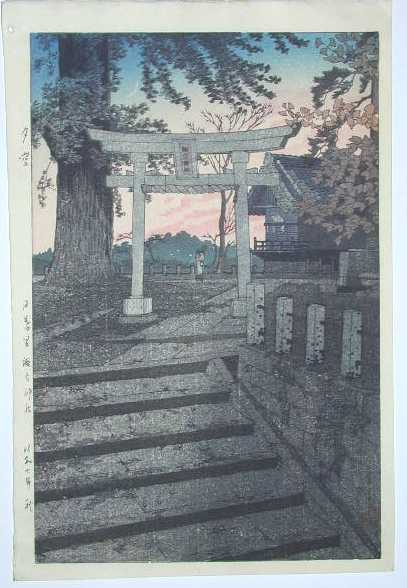
Shiro Kasamatsu, "Evening at Suwa Shrine, Nippori".
Complete print after bleaching of stains in the left margin.
Examples above: two brown stains, caused by mold and decomposition of the glue used for backing, were removed almost completely. (Sorry, the binding hole didn't disappear).
Return to top 6. How to remove stains, foxing inside the printed area?
The basic rules are the same as for stains on margins, but dilute the bleach with distilled water at least 1:1. The additional risk is that the colors might be affected as well and that you get by migration of the bleach a sharp edge. To avoid sharp migration frontiers, either apply the bleach within a limited, secluded field of color (see example, where the bleach was only applied in the white field), or rinse the print after the bleaching step completely in distilled water. Don't forget to neutralize. For full rinsing, follow the same procedure as for full print bleaching explained in the next chapter. In the case of shin hanga and sosaku hanga I never have experienced bleeding of colors while rinsing a print, but this possibility cannot be excluded, because we never know which printing inks were used. They only case I remember bleeding was with the bright red of a Meiji era print.
|